


Trunk Sound Deadening
Every driver knows what it is like to hear noises and sounds during the ride. Street noise, panel squeaks, hammering, car sounds, road and wheel noise. All this mush distract the driver and negatively affect the comfort.
Quite frequently, such noises and sounds come from the trunk, and people who get bothered first are rear-seat passengers.
Kilmat will help you reduce unwanted noises and make your car more comfortable. Sound deadening touches not only doors, floor, and roof, but also the trunk. Kilmat dampens foreign sounds – e.g. suspension or engine noise. Also, this procedure chokes off trunk panel sounds or rear door squeaks.
Also, we recommend audiophiles to sound-deaden their trunks. How are sound quality and sound deadening related?
If you put a subwoofer into the trunk without having prepared the trunk, when you turn the sub on you will hear the interior and trunk panels rattling and vibrating.
Sound deadening will give you the following: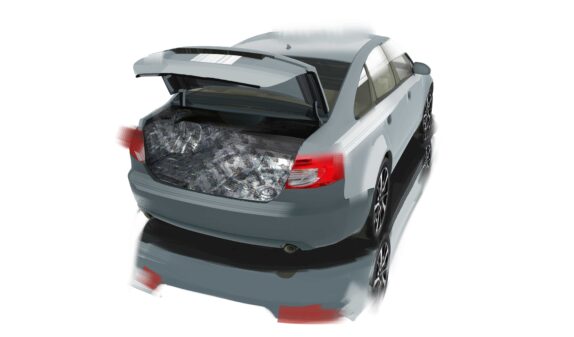
- Lower suspension, wheels, and muffler noise.
- After applying Kilmat, all resonating sounds will fade away, whereas the acoustics will sound better and deeper.
- Trunk sound deadening will make the lid close softer and quieter – any driver will enjoy it for sure.
So, let’s begin. First, prepare all the materials:
– Kilmat sound deadener
– gloves (to protect your hands from cutting and staining)
– degreaser
– marker or pencil
– ruler
– piece of cloth
– clip removers
Remove everything from the trunk.
Following the instruction, remove all plastic panels and the trunk covering. Clear out the metal surface, degrease all the metal parts – this is essential for better adhesion and rust prevention.
Remove the protective layer from a Kilmat sheet and apply the sheet on the surface. Apply the material on all the metal parts. This may be quite difficult as the trunk bottom is irregular and rough-surfaced. For better sticking, cut the plasterboard templates beforehand and then use them to cut the sheets of the fitting shape. We recommend following this sequence: trunk bottom, rear wheel arches, trunk wings (right and left recesses). After that goes the trunk lid.
Having removed the lid, degrease all the interior and exterior metal parts. Apply small sheets on the interior surface through the manufacturing holes in the lid.
IMPORTANT! Most people wonder if they need to roll down the material or they just need to apply it and slick down. Answer: always roll down the material! Poorly-rolled material will work much worse; furthermore, it may come unstuck later. If the material is not rolled down, air bubbles may form underneath – air bubbles lead to condensate and then rust. Roll down every sheet.
Then process the external lid surface (under the covering). Cover all manufacturing holes and wire holes.
Final stage: assemble the trunk following the proper sequence.
The entire process will take a few hours, but it is completely worth it – you will see the result at once. Want to feel the difference in a second? Knock on the unprocessed metal surface, and then on the surface reinforced with the material. We bet you will hear the truth.
And your passengers will love it.
Stealthy and smooth driving and fine-quality music will please you all the way.